In general, it seems that there are quite a lot of material functions already written for you to make your life easier.
Wednesday, 14 January 2015
World aligned textures in UE4
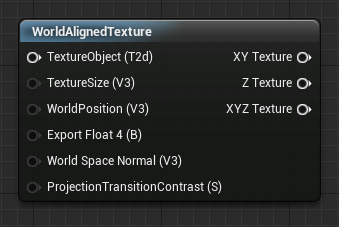
Oh, wow. I just found out that UE4 comes with a bunch of material functions that will make mapping textures to world coordinates easier and my posts somewhat obsolete :)
Monday, 5 January 2015
UE4 again.
So here's that first test I mentioned before, simply captured with fraps. It was easy after all.
Nothing ground breaking, this still just a test but I'm glad it can work the way I imagined it would.
Monday, 15 December 2014
UE 4!
I finally got myself a copy of unreal 4.
There are a lot of things I want to test but my main goal was to see if I could make an animated version of my drawings.
This is a first test after a few hours of work. Very early but promising, I think I'll be able to achieve what I have in mind.
There are a lot of things I want to test but my main goal was to see if I could make an animated version of my drawings.
This is a first test after a few hours of work. Very early but promising, I think I'll be able to achieve what I have in mind.
Yeah, it's a screenshot. So much for an ‘animated’ version. I'll also have to find a method for capturing editor stuff …
Wednesday, 1 October 2014
Still alive.
It's been a while and I've got 3 more examples about mapping a texture to world coordinates almost ready, but these days I'm very busy with some other project of mine.
I also draw (on paper, yes, Sir) and I'm preparing my first exhibition.
Tuesday, 19 August 2014
Happy scientific accident.
I was in photoshop and intending to use the gradient map. (Image > Adjustment > Gradient Map)
I accidentally clicked an existing saved gradient and realized I had made sort of a scientific texture.
You know, like that sort of stuff:
Here's my photoshop gradient:
And that's the result on my texture:
The real question is: what on earth did I create such a gradient for in the first place??
Thursday, 7 August 2014
Mapping a texture to world coordinates. Part 2.
Example 1: blinking mask
Back on Enslaved, the environment artists used this method to map a gradient that would reveal some floor lights along a corridor so they would appear to blink sequentially.
This setup is very simple. This is the texture I'm using:
(It's actually vertical but I rotated it for the sake of this post's layout.)
Since there's a lot of black it will repeat less often.
And this is what the unreal material looks like. As you can see, it's nothing different from what I described in the previous post.
Now in the map, I've just put down a few small cubes with that material on and there I have my blinking lights (sort of).
and here's what the map looks like with the material on the ground plane.
It actually took me longer trying to optimize those gifs than it took to make the whole thing in unreal.
This is not the most exciting of all examples but more will come. Stay tuned.
Monday, 4 August 2014
Map a texture to world coordinates. Part 1.
Today we'll start looking at mapping a texture UVs to the world coordinates.
It's taking quite long to write the whole thing up so I'll keep the examples for later posts.
Mapping to world.
We've looked before at remapping a texture with another texture. The coordinates of a texture have vertical and horizontal data, which you can remap to whatever you want.
‘Whatever you want’ can be the world coordinates.
We're going to use the world position, but we need to divide it to start with. The values not quite usable as they are. The more you divide the world position, the larger the texture will be. It's sort of like zooming in your world: the texture appears larger.
The result is just like setting your texture tiling in a texture coordinates node.
Dividing the world by 500:
Next thing we need to know is the way your material will be oriented in the world so as to map the texture to the correct two axis. Imagine that you're facing a plane with your material on it. Which axis do you see pointing away ?
In our example we want to map it to the ground. If we look down from above, we see the R and G arrows pointing away. The z channel will not be visible.
So we use a component mask to keep only the R and G channel (x and y).
Bear in mind that the texture will stretch along the third axis, the z axis in our case.
Would we be to use lerps and map the texture several times along different axis we could start to get a 3D feel. (at a cost obviously)
</teaser>
That's it for today, several examples will come soon.
Subscribe to:
Posts (Atom)


